CUTTING IN METAL 101
7 RULES
– to insure you the best result when cutting in metal materials
We highly recommend you to read the text below thoroughly before ordering metal & steel cuttings.
The file formats are the same but this kind of laser cutting differs from cuttings ind other materials. You file has to be vector-based graphic and send as either PDF, ai, dxf or dwg. .

1. Parts & leftover material
We will dispose the leftover material from the cuttings. This means that you will only receive the parts and not the leftover material. In that way you will save money on shipping as the package will weigh simnifically less.
100% of the leftover materail will be reused.
2. Automatic attachment of small items
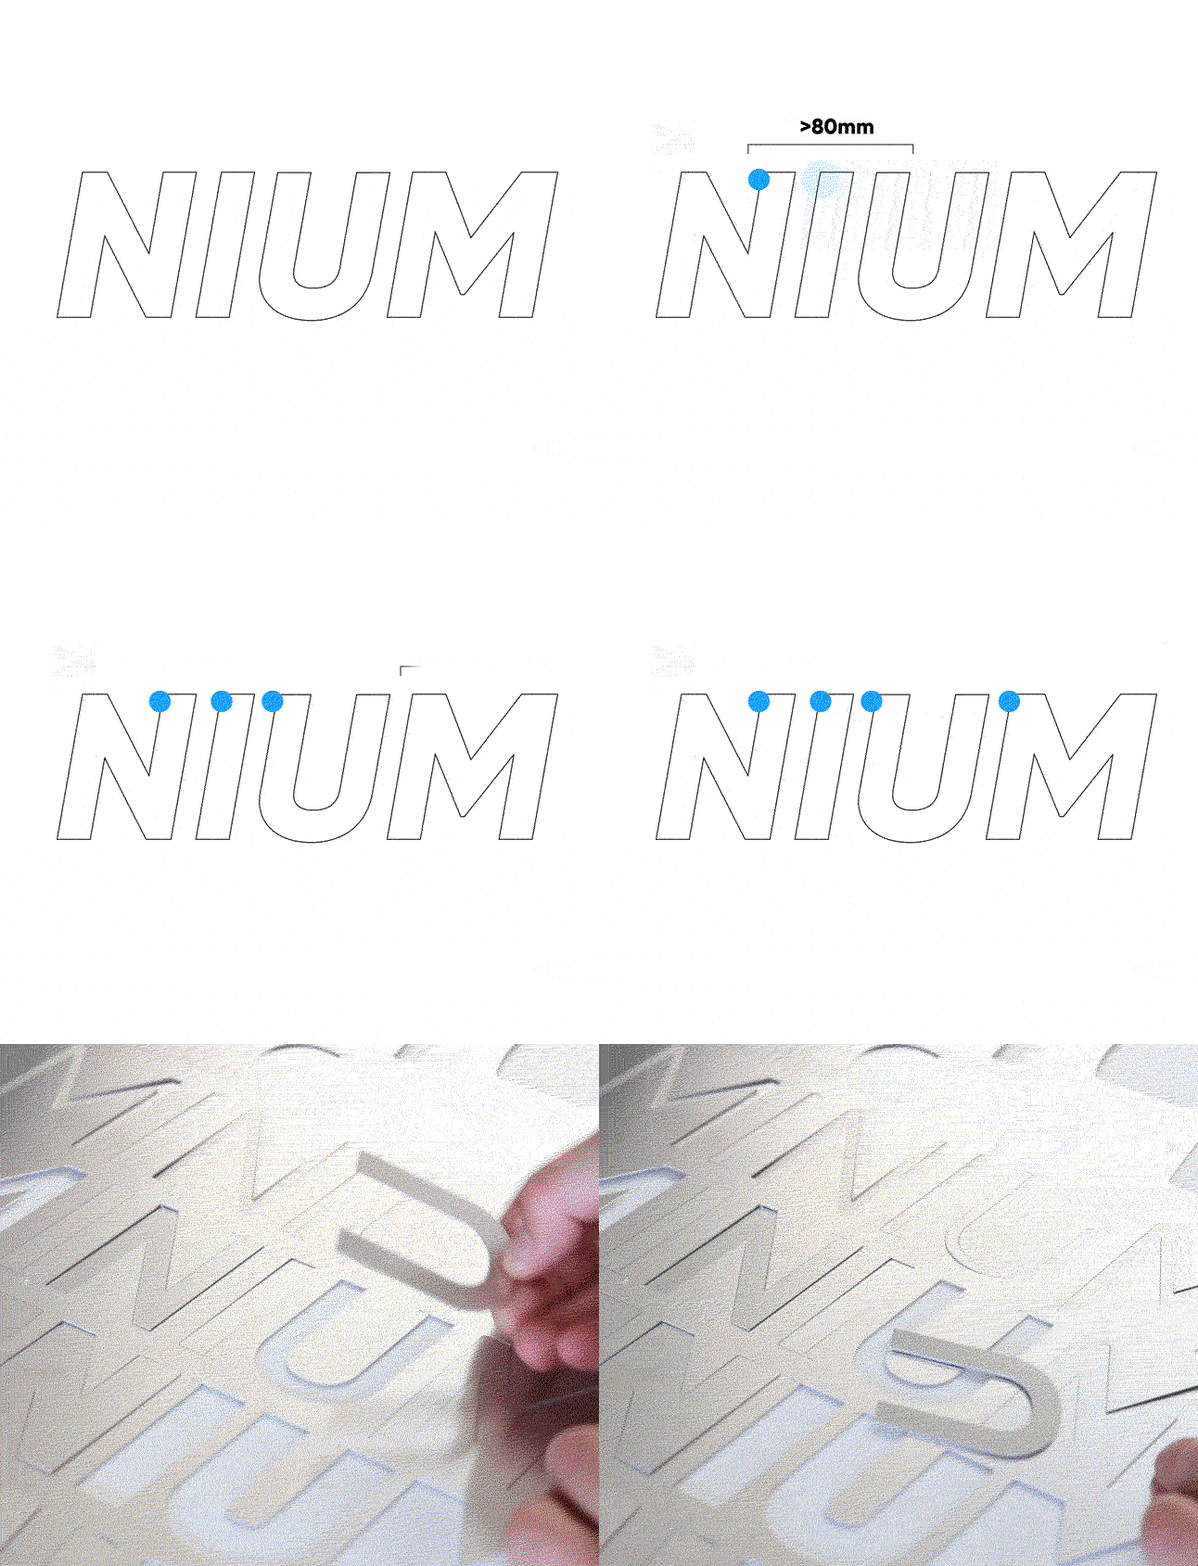
Due to the high oxygen pressure in the machine parts that are less than 80mm will automatically get attached to the material using micro joints.
Before the cutting starts the machine will carefully make small bridges/ welds that will keep the items in place during the cutting process.
When the cutting is finished the bridges are easy to break through and the items can be removed from the material sheet.
- Small grates can appear in the small grates in the micro joints on the parts. These are easily removable by using a small file.
- When cutting a lot of small items you will receive the leftover material as well.
3. Lead in
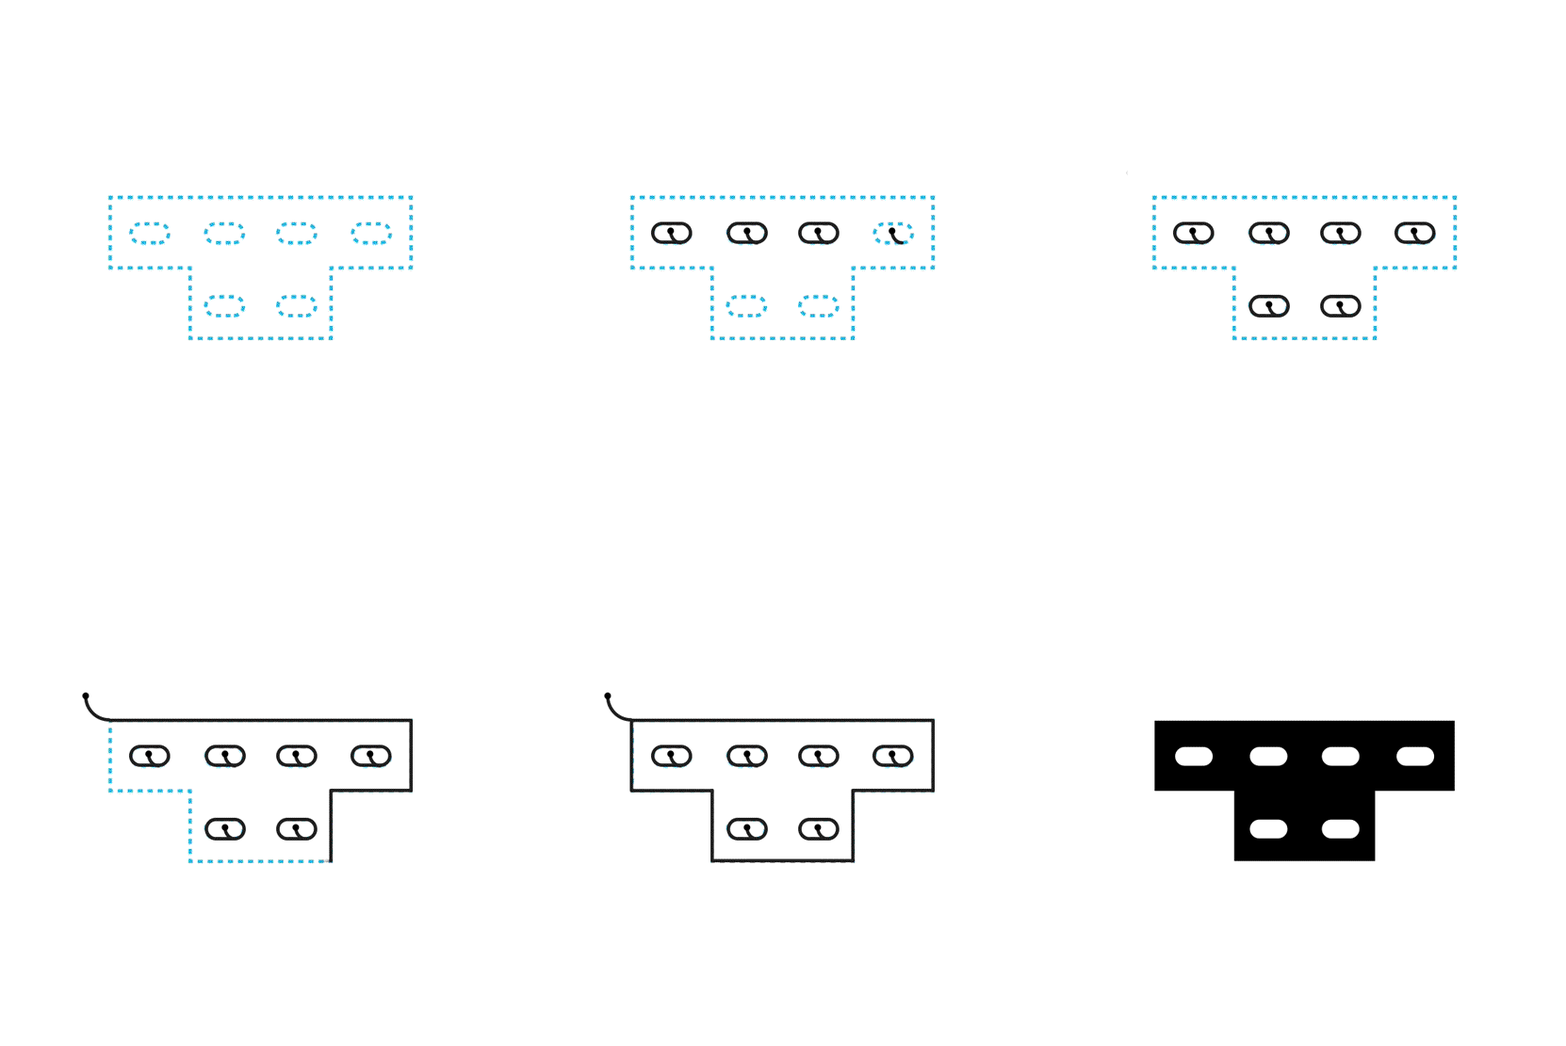
The process of metal cutting differs from cutting in for instance acrylic material and wood as metal doesn’t evaporate during the cutting proces. The metal melts. To insure the highest precision possible the laser starts to cut a couple of millimetres outside the cutting line.
Be aware that the machine see all inner parts of the design as leftover material. Therefor the laser will place the ‘lead in’ in all holes within your objects.
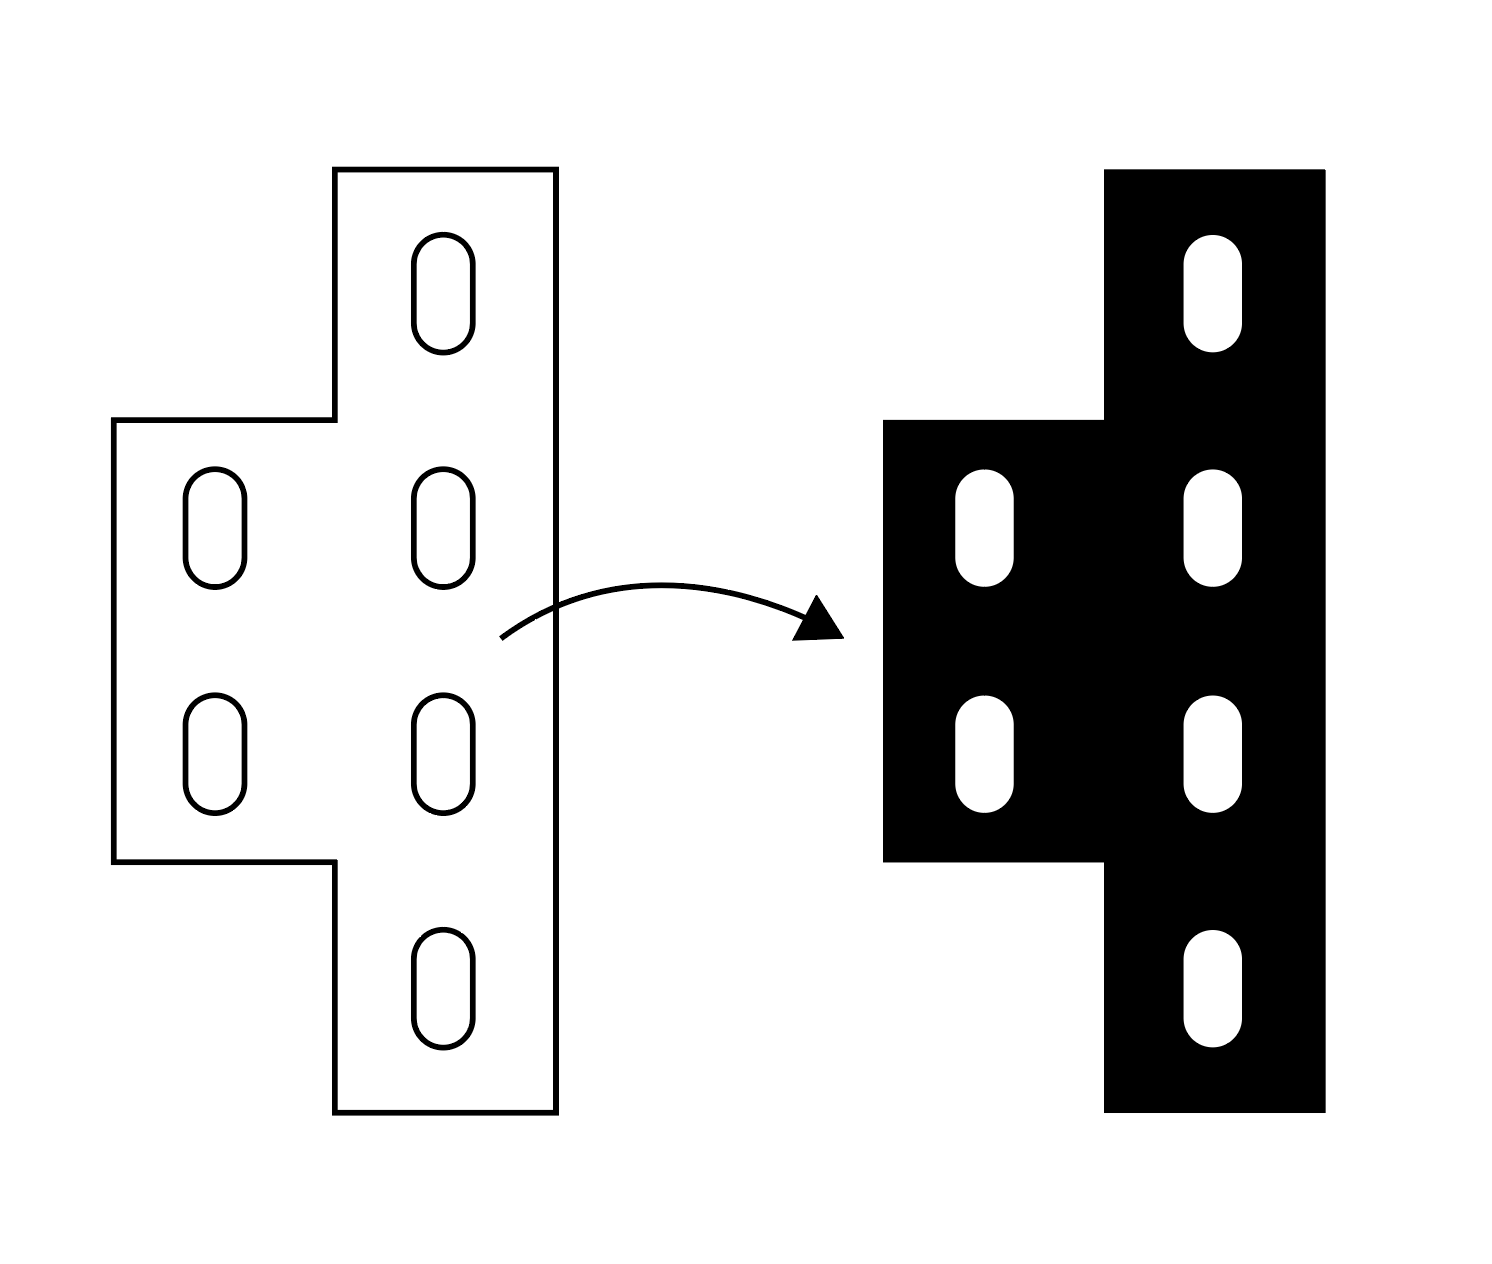
With fill colour you indicate which parts are the actual design and what is leftover material. You decide which colour but please avoid the colour white.
4. ONLY closed curves
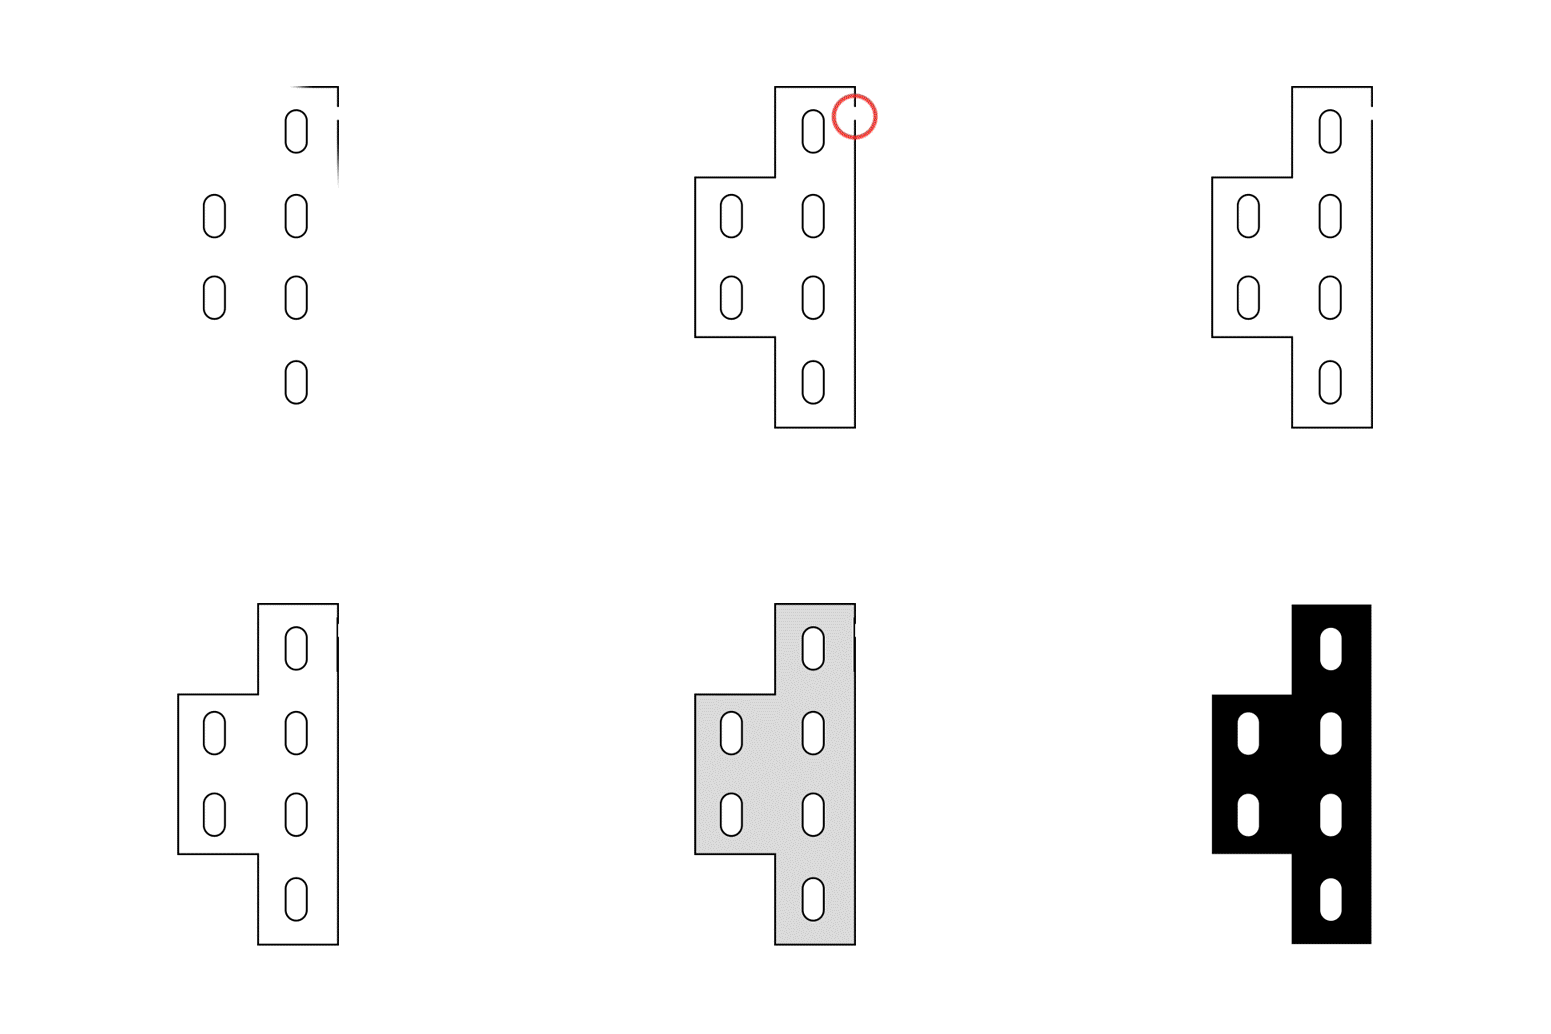
When cutting metal it is very important that all vector lines and curves are closed as the machine doesn’t know where to place the lead in. If the lines aren’t closed we can’t guarantee that the lead in will be placed correctly.
5. Curves
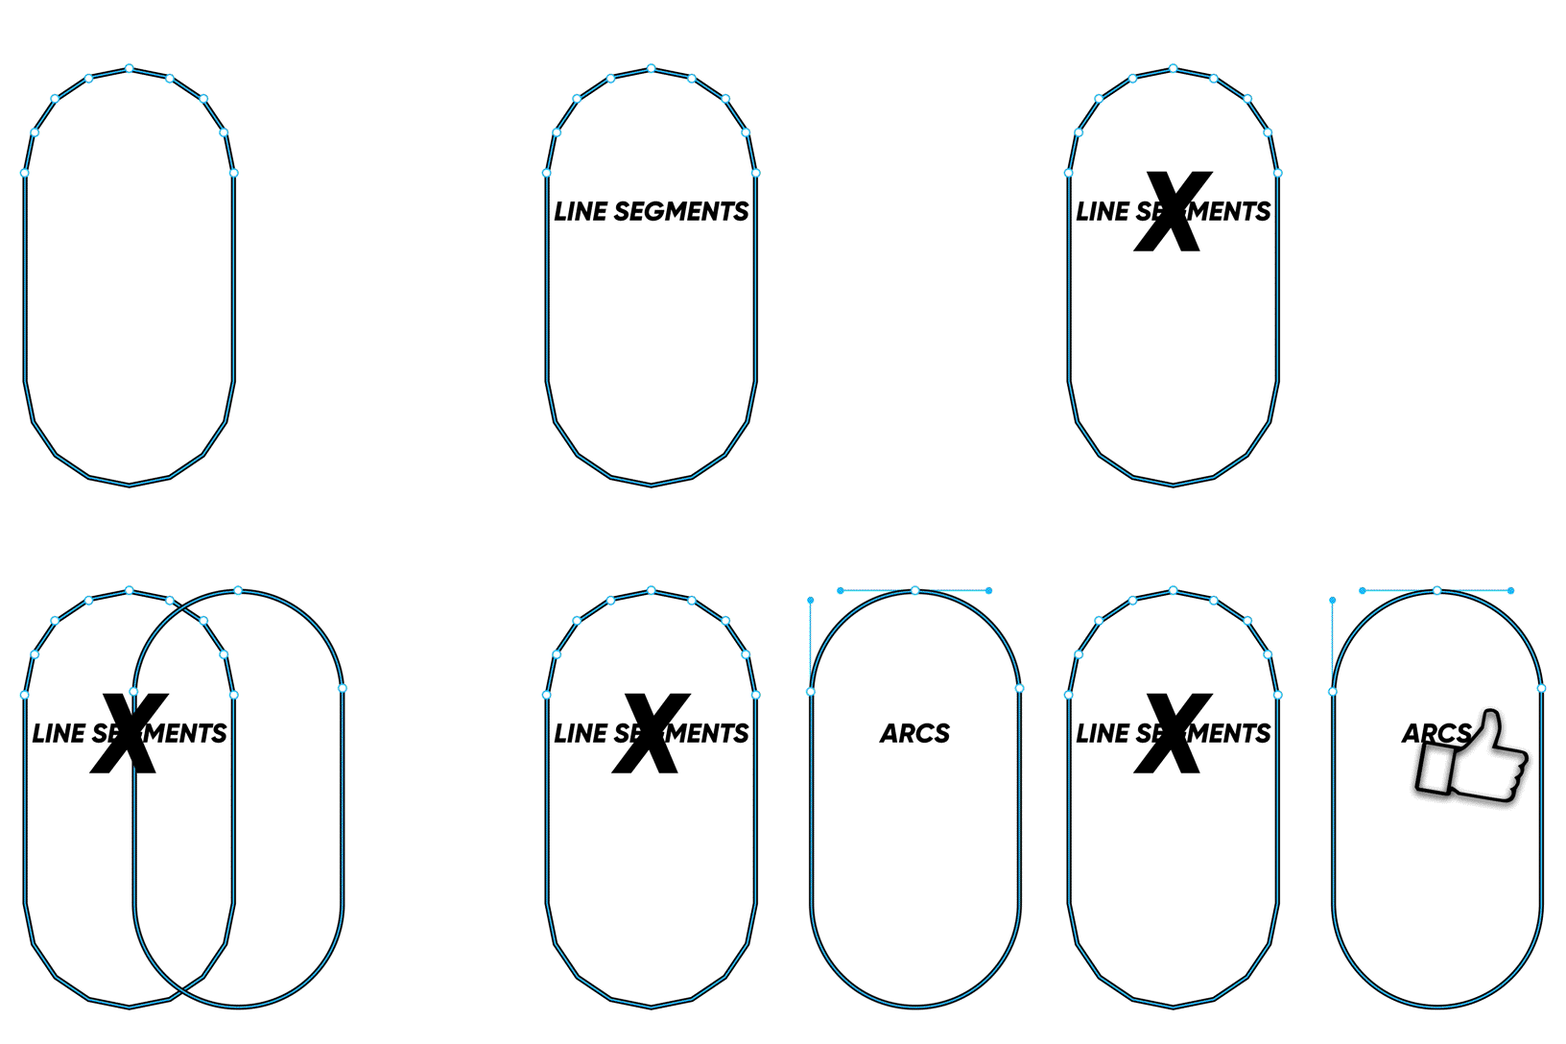
When preparing your design for being cut in metal it’s important to only use smooth arches for making round edges/corners etc. It’s not optimal to create round edges/corners etc. by using a lot of short and straight lines as the rounding can appear uneven. Therefore you should try using as few point as possible.
6. Shared lines
It is not to your advantage to do shared lines in metal cuttings. The metal laser needs to be able to analyse every single part before it can start cutting. Therefore keep a min. 10mm distance between your objects.
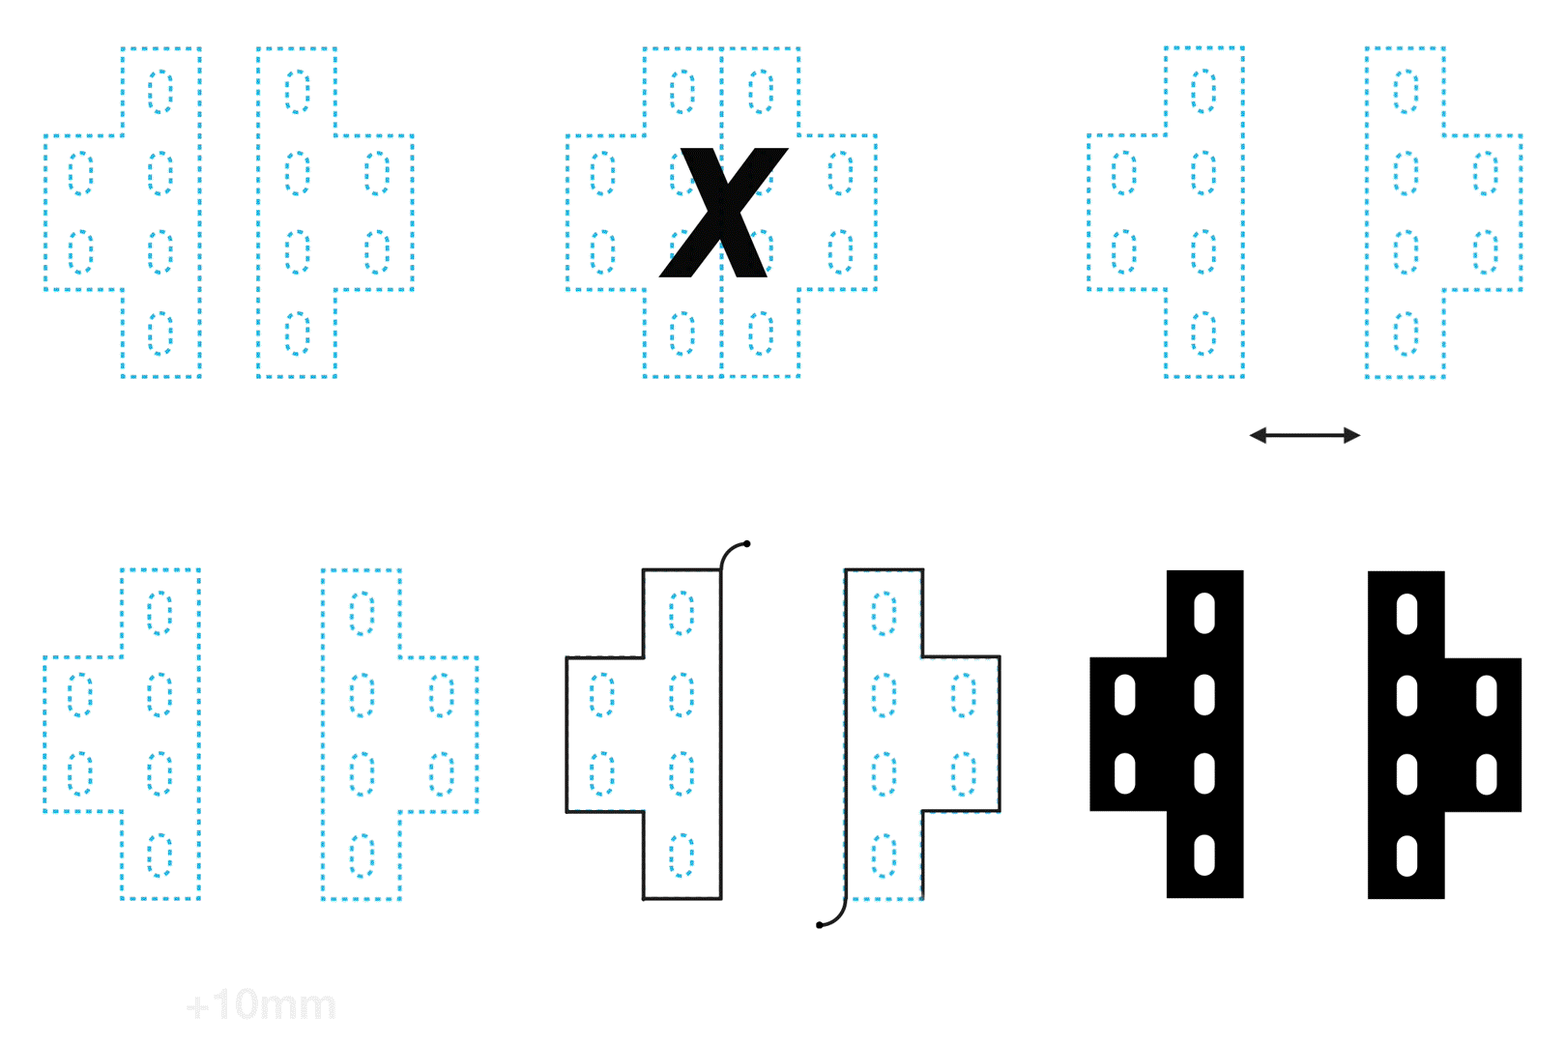
7. Holes and thin parts
We highly recommend that the thinnest parts of your metal cuttings aren’t smaller than 10mm as the material in fastened with a high vacuum suction mechanism. Very small parts have the risk to be sucked into the vacuum and disappear. The distance between parts and holes in the metal sheet also needs be min. 10mm. Are you making at plate of holes make sure that there is a 10mm distance between the holes.
Remember to take the size of the material when you design and nest your files on the material sheets.
Be aware that you will pay for the entire sheet of material. We can’t cut the same sheet of material twice and therefore all of the leftover material will be sent to be remelted.
Therefore make sure to use as much of the material as possible to avoid leftover material.
Calculate your price within seconds
It will only take a couple of seconds to upload your cutting file and see the prices for cutting it in copper, brass, aluminium, steel and stainless steel.
From ordering the process is only 7 work days.
Calculate now