Guide to setting up files – Inkscape
In the section below, we have put together some of the most important things you need to get your design ready for laser cutting. We have based our guide on the free graphic program Inkscape, but you do not have to use any specific program. You can download Inkscape here. The website also offers instructions on how to use the program.
CONTENTS
- FILE TYPES AND SIZES
- CONVERTING TEXT TO LINES
- EXPANDING LINES
- CHECKING YOUR LINES
- APPLYING YOUR COLOURS
- VECTOR AND RASTER ENGRAVING
- SHARING LINES AND CHECKING DOUBLE LINES
- POSITIONING YOUR OBJECTS
- DISTANCE BETWEEN OBJECTS
- MAKING GOOD USE OF THE SPACE
- SAVING YOUR FILE
FILE TYPES AND SIZES
Your file needs to contain vector-based graphics and should be saved as a PDF. Unfortunately, you cannot use pictures and text documents.
Our standard sizes are A4, A2 and A1. If you can keep your drawing within these sizes, you have plenty of different options for working with our materials.
Don’t worry, we can still work with designs that are bigger than our standard sizes. We can cut in sheets up to 3200 x 2200 mm. Send us a mail to ([email protected]), and we will work it out together. However, please be aware that not all materials are available in all sizes.
CONVERTING TEXT TO LINES
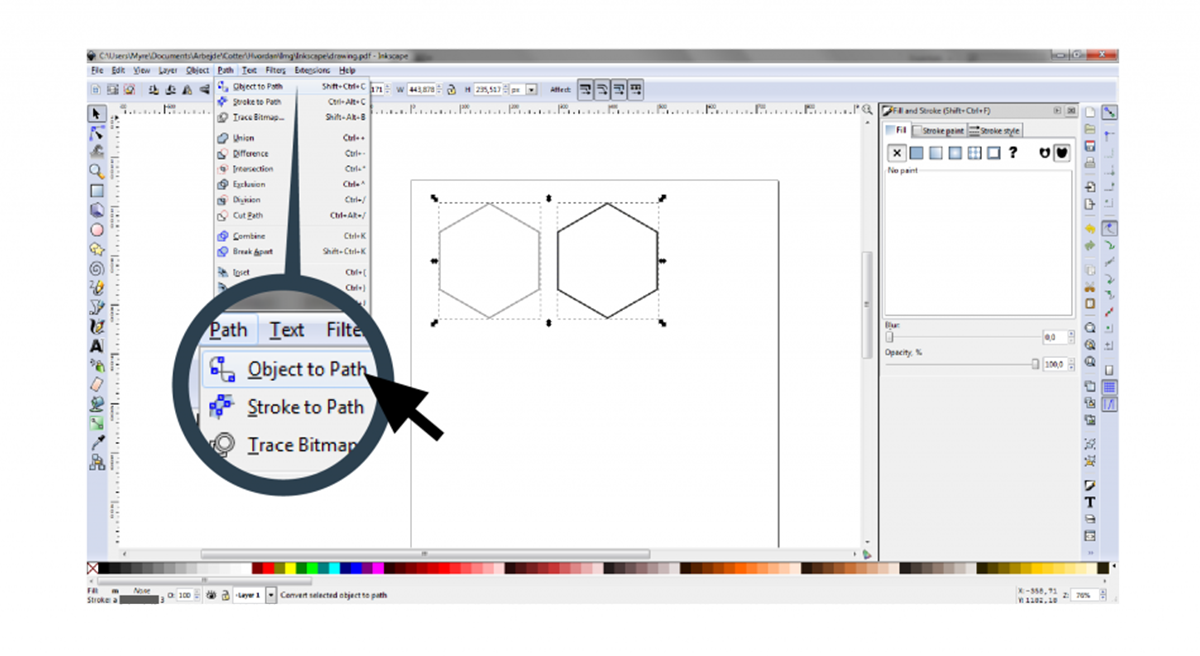
If you want text to be cut, it has to be converted into lines first. Select the text you would like to convert to vector. Select Path > Object to Path.
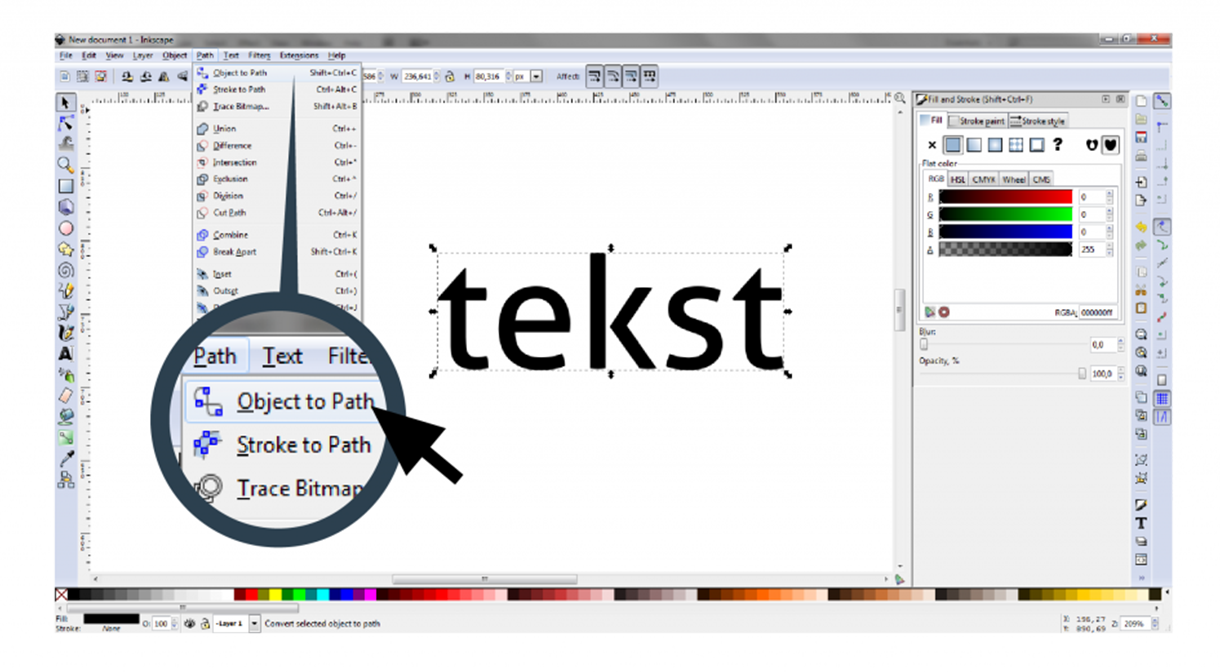
You now have editable vector lines that the laser can understand.
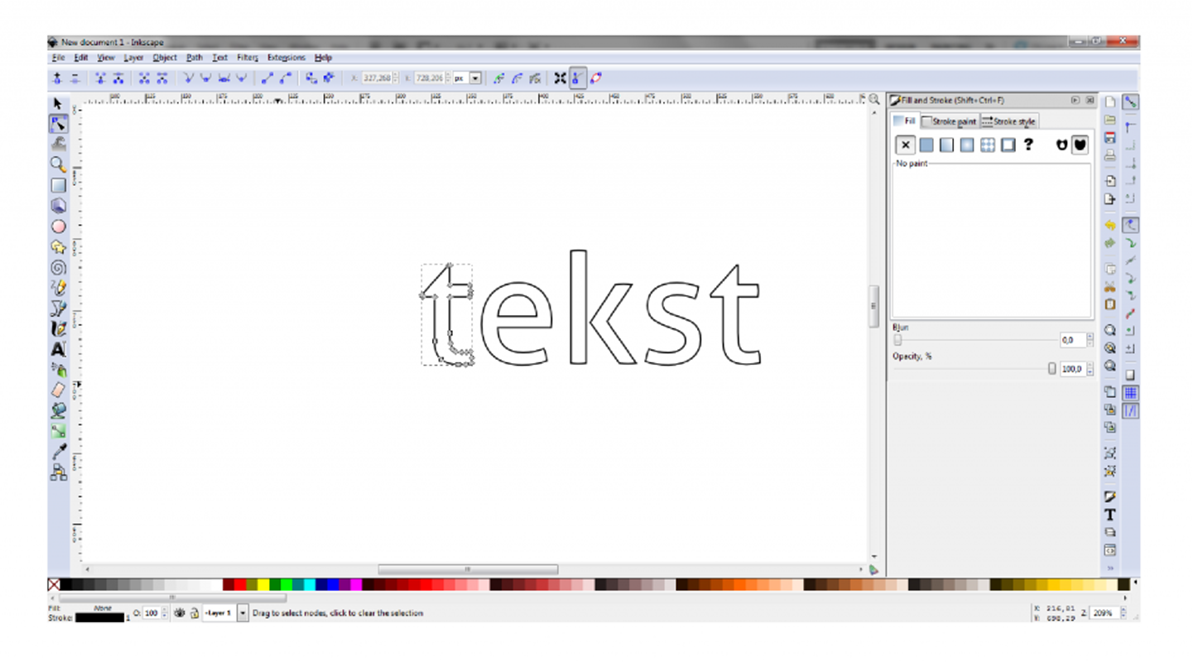
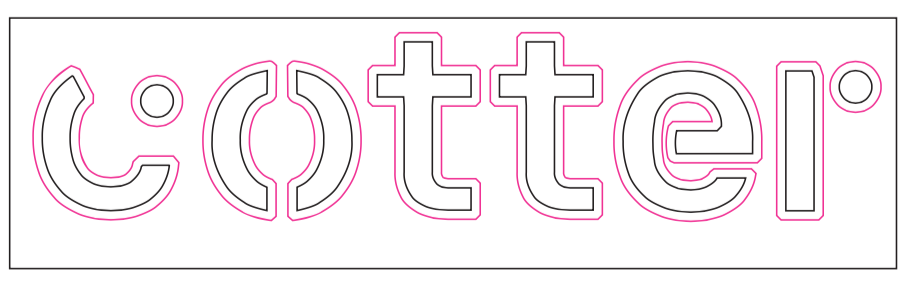
EXPANDING LINES
The laser cannot read the thickness of lines and therefore will not distinguish between a thick one and a thin one. If you have made a design where you would like your outline cut as a shape and not as a line, you must first expand it with Inkscape’s “Stroke to Path” function.
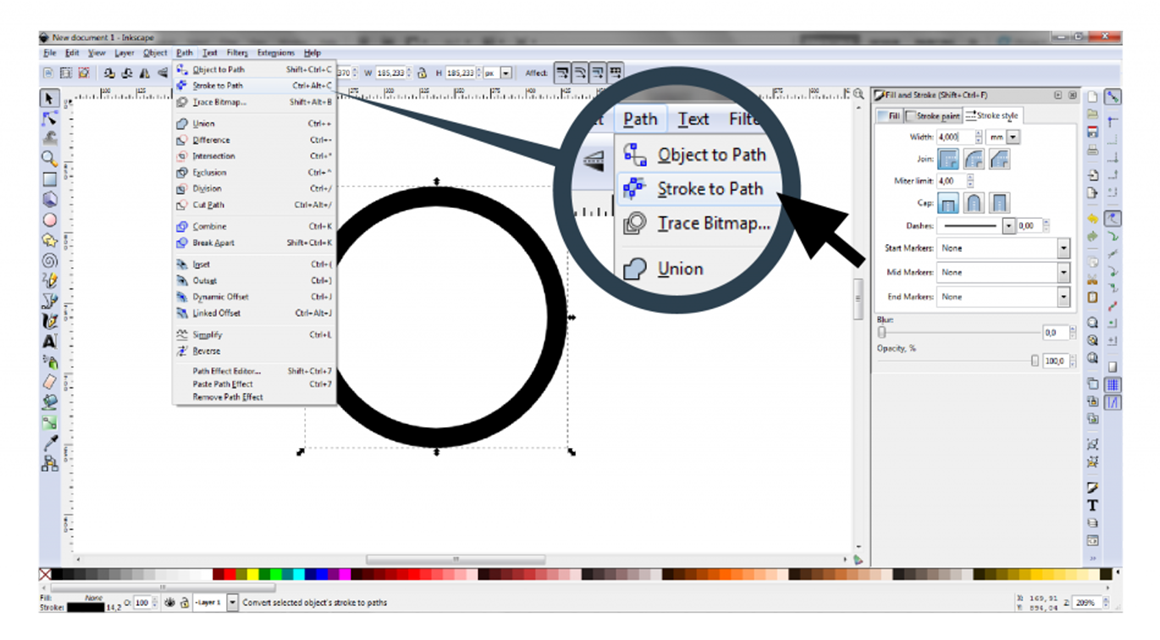
Here we have drawn a circle outline of 10pt and no fill. It is meant to be cut like a ring and not as a circle, and so it has to be extended. Mark the object and select Path > Stroke to Path.
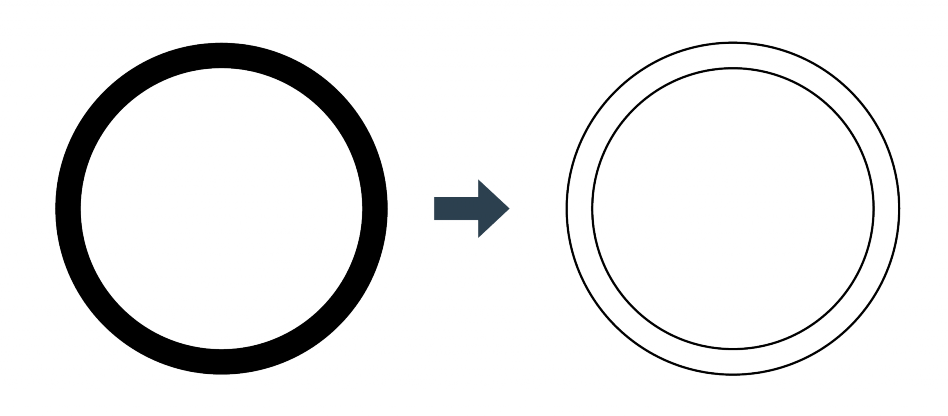
Instead of a circle with an outline thickness, we now have a ring. Finally, an outline without fill is added, and your vector file is ready for cutting.
CHECKING YOUR LINES
The laser cuts the lines you have made, and ignores any visual effects you may have added on top. Therefore, you should always check the “raw” lines before saving the file.
Select View > Display mode > Outline. Notice how a square with white fill colour has been used to visually cover the lines. The laser will see and cut the lines, even though they are covered. Therefore, you should ensure you cut away any excess lines away before uploading.
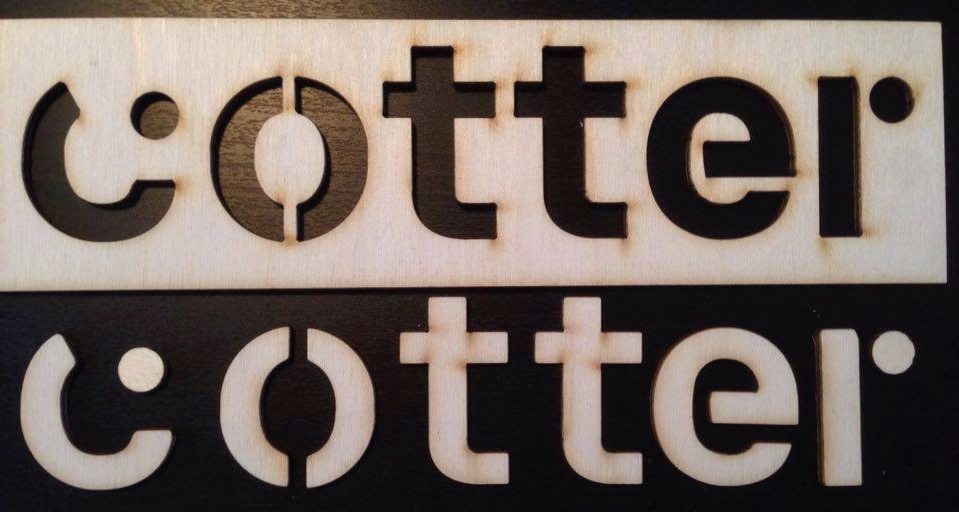
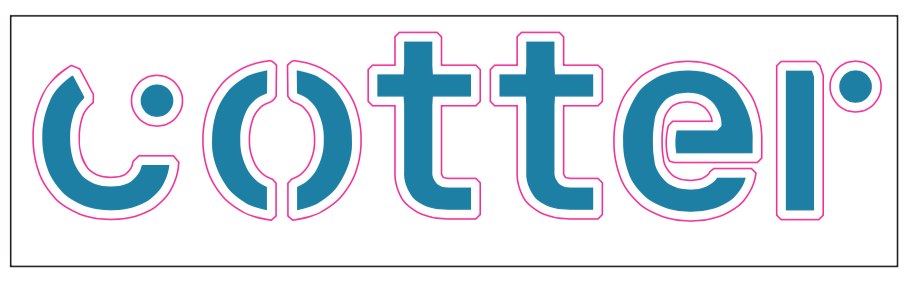
APPLYING YOUR COLOURS
In order for us to know which lines you want to be cut and engraved, and which lines should be ignored, it is important to give them each a different colour.
When you upload your file, you should choose what to do with the different line colours in your file. It is not important which colours you use, just that you can see a clear difference between them. Below you can see examples of how to choose what should be cut, vector engraved or raster engraved.
Cuttin only: 1 line colour
Cutfile.
Result.
Cutting and vector engraving: 2 line colours
Cutfile.
Result.
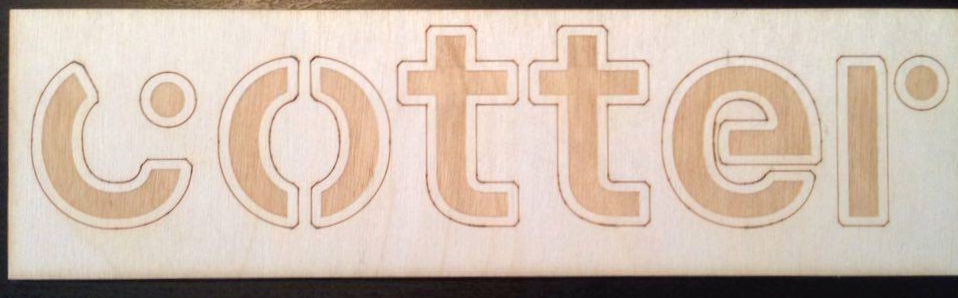
Cutting, vector engraving and raster engraving: 2 line colours and 1 fill colour
Cutfile.
Result.
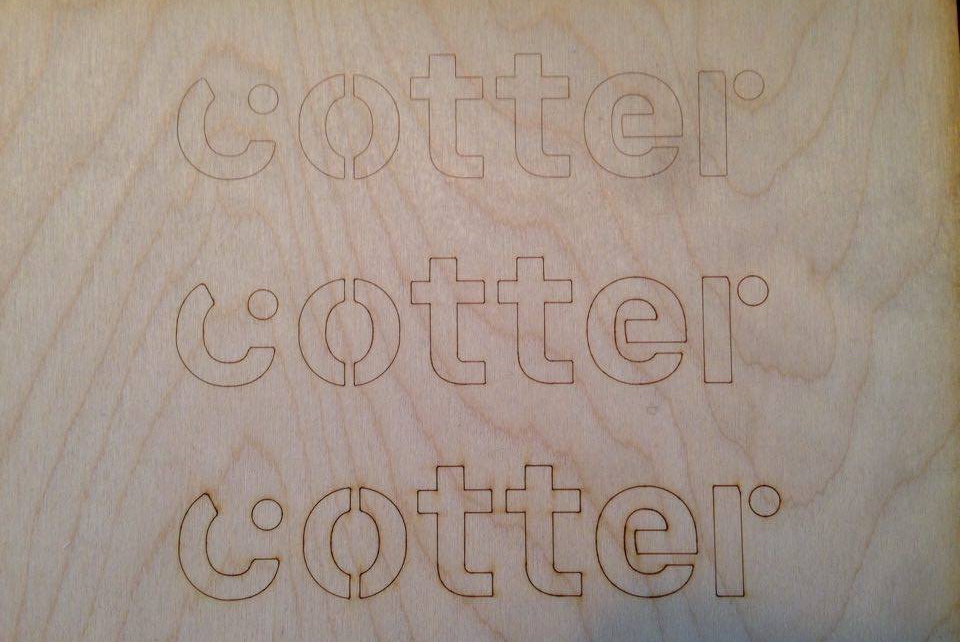
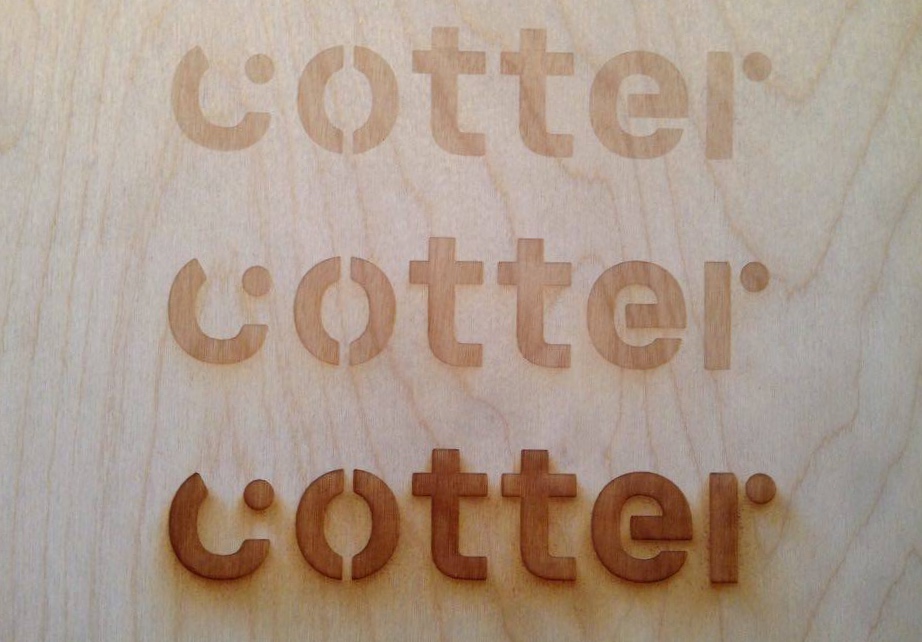
VECTOR AND RASTER ENGRAVING
We have made a test of the three grades of both vector and raster engraving. When you upload your file, you can choose between light, medium and heavy. You can see what they look like below.
SHARING LINES AND CHECKING DOUBLE LINES
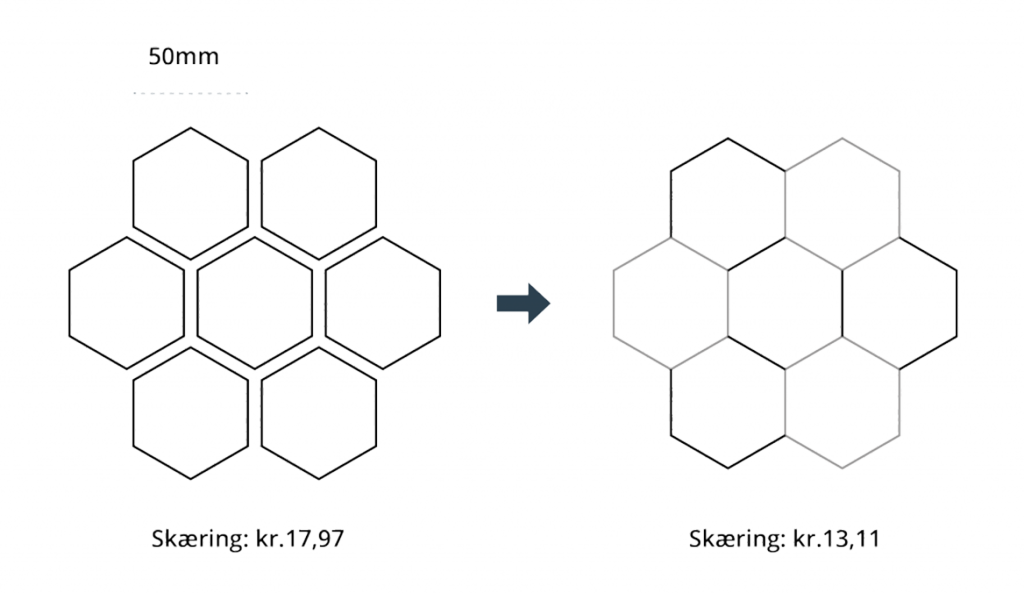
If you are cutting multiple objects with straight edges, you can save cutting time and money if you place your items so they share a cutting line. Sharing lines can be a smart way to save money, but please be aware that the best results are usually achieved by allowing each item to be placed separately, with a minimum distance of 3-5mm.
If you have double lines in your file, you will pay double for the cutting as we have to cut twice along the same line. Make sure to check if you have any unnecessary double lines, and delete them before you save the file for uploading.
When you draw a shape in Inkscape, you first have to make it into “paths”, to enable the laser to understand it and then you can edit the shape afterwards. When you have drawn a shape, you select Path > Object to Path. This will provide you with an editable shape.
If you want to share lines between two shapes, make sure you delete one of the lines, as the laser will otherwise just cut along the same line twice. You do this by selecting the “Nodes” tool (F2) and marking the corner points around the section of line to be deleted. Once marked, click the “Delete segment between two non-endpoint nodes” (shown below).
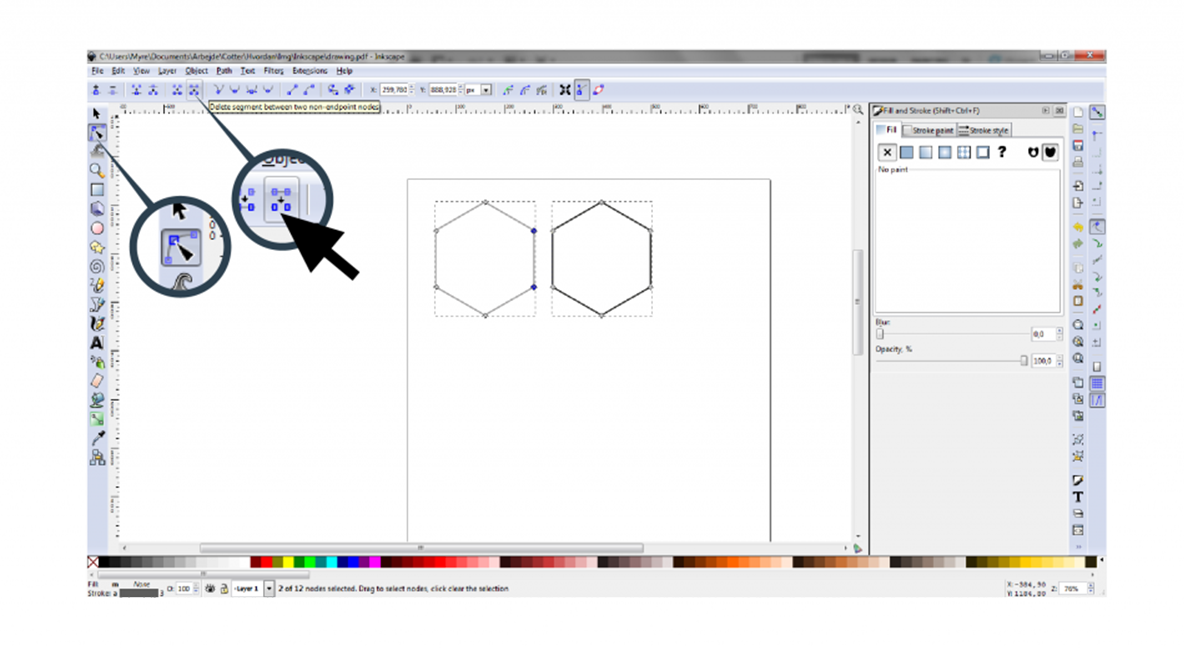
Finally, you move the shapes together until they share the section of line from one of the shapes.

In the example below, you can see the price of cutting in 3mm black acrylic (the price is without start-up fee and materials).
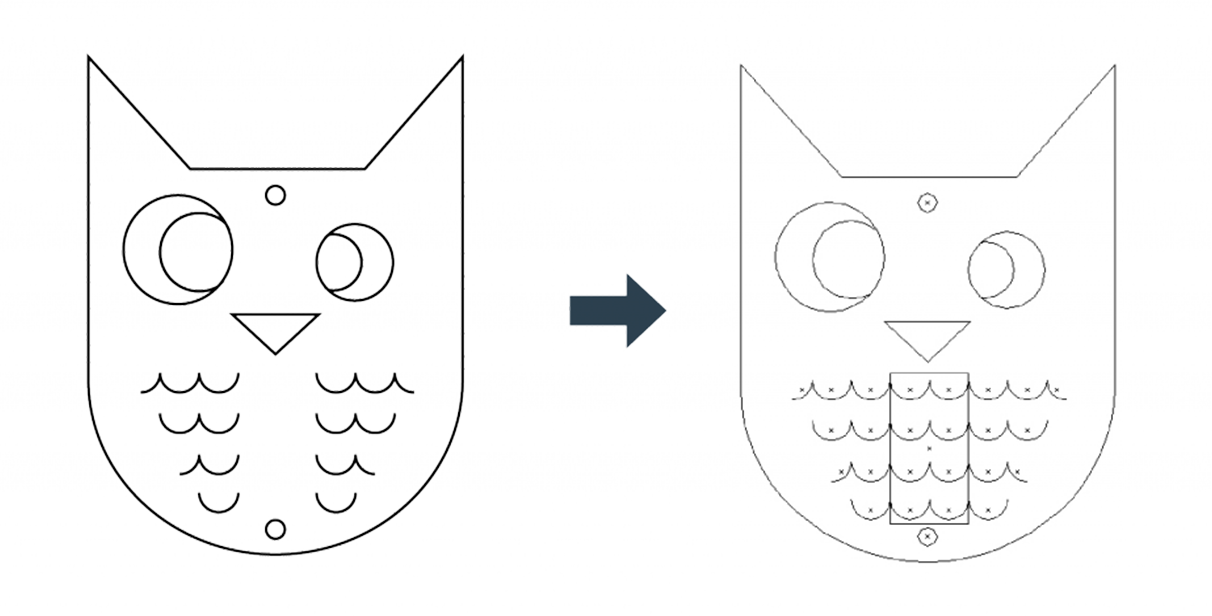
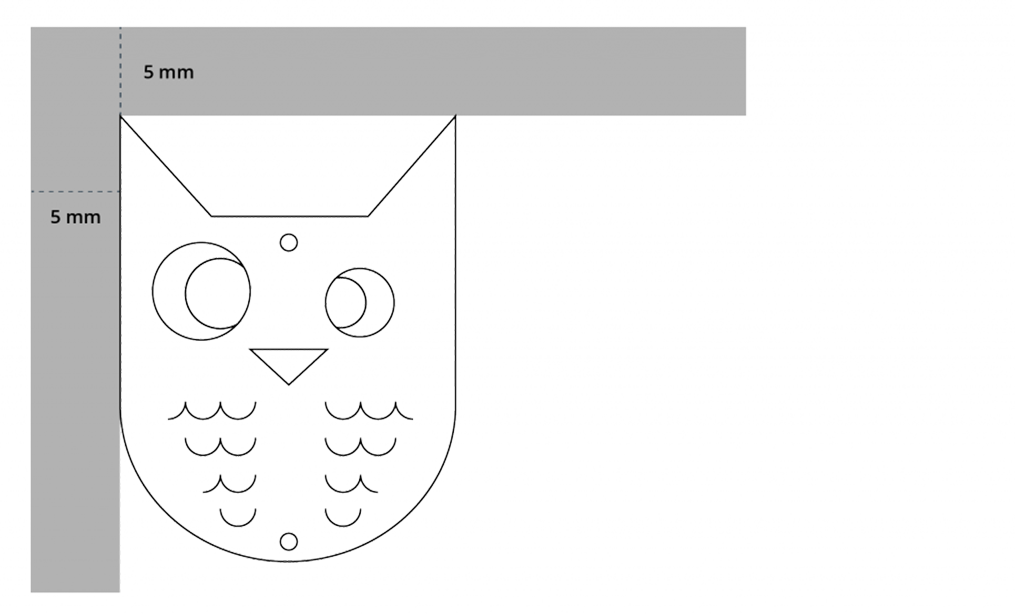
POSITIONING YOUR OBJECTS
If you want to ensure that your design is cut properly, you have to stay within 5mm (marked in blue in our templates). If you keep within this boundary, you can be sure that your design will fit on the sheet. Remember the laser cuts in 1:1 – i.e. if you need a design of 25mm x 30mm, this is the size it should have in your file.
DISTANCE BETWEEN OBJECTS
Remember that the laser removes material when it cuts. In other words, this means that if you place your items too close to each other, you risk burning the material between them away. A good rule of thumb is not to put objects closer to each other than the distance equal to the thickness of the material being used, e.g. 1mm distance when using 1mm cardboard.
However, we recommend a minimum distance of 5mm for all plastic items, as the sheets have a tendency to warp.
Each material behaves differently so try to perform a test before making a large order. You can also see cutting examples on our material list.
MAKING GOOD USE OF THE SPACE
If you have many small components, it can be well worth positioning them in your file in advance, to ensure they use the space optimally – but remember that they must not be too close together. See Distance between objects. In this way, you can save material costs or maybe make enough space for extra copies on the sheet.
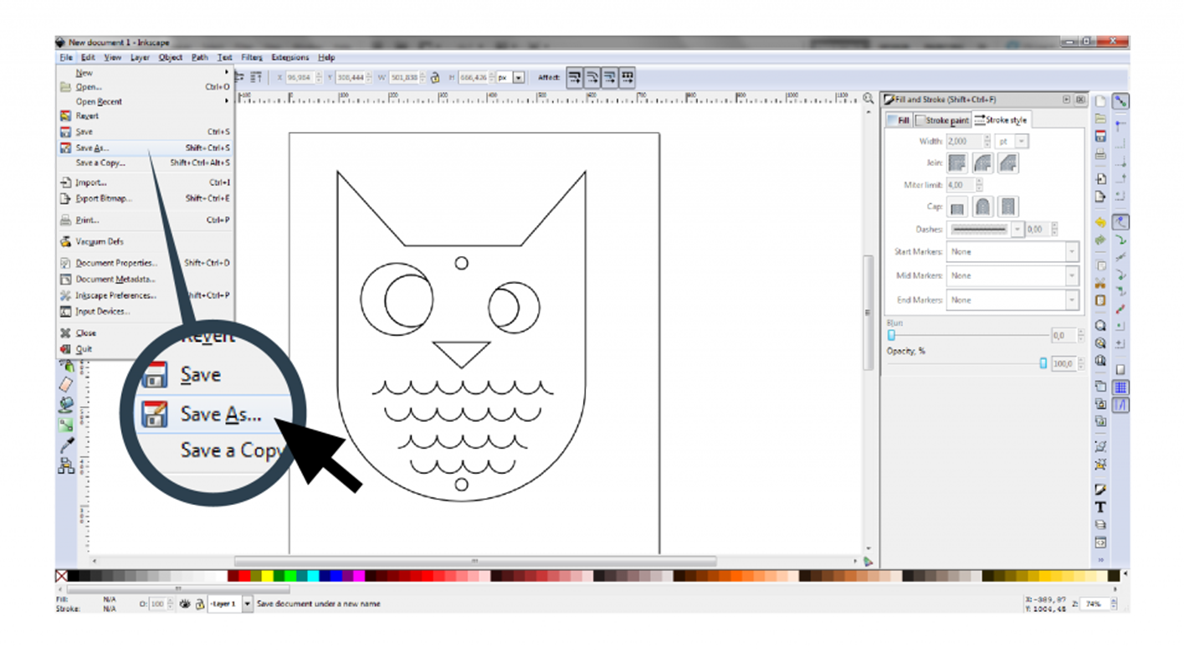
SAVING YOUR FILE
When you have finished working on your drawing, you are ready to save your file. Check your drawing one final time to make sure everything is correct. Follow the guide below when you want to save your file.
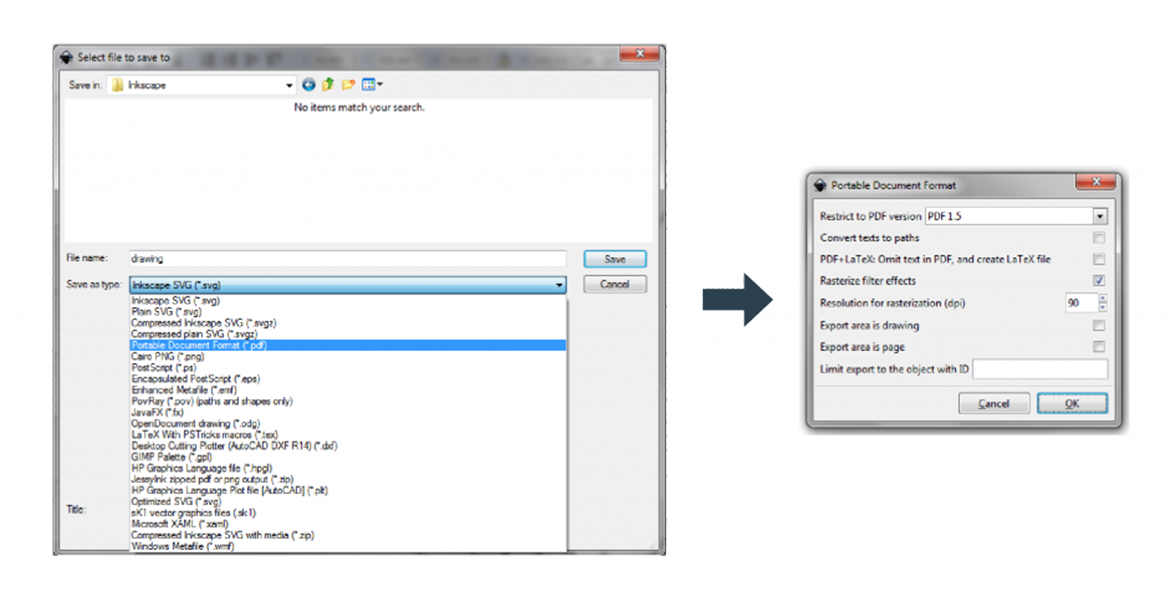
Select File > Save As…
Select “Portable Document Format (*.pdf)”, give your file a name and click “Save”. A dialogue box will pop up and you should just click “OK”.
Now your file is ready to be uploaded.
Program
Templates
We recommend that you download and use our templates when you upload files on cotter.dk. This is not obligatory but is intended to be helpful to you.
If you choose not to use our templates, you need to remember the following:
Your file needs to have vector-based graphics – i.e. no pixel graphics or images.
Work in 1:1 – Always make sure your drawings are in 1:1 scale. You cannot scale when you upload.
Keep your distance from the edge – our templates feature a marked area that you should keep within. You must not place items right up the edge. A rule of thumb is 5mm to the edge.
You should save the file as a PDF – You can also upload ai files, but not all versions work so effectively.
There are no hidden elements (ctrl + y or cmd + y).
Cutting, vector engraving and raster engraving each have their own colour.